background

Friday, December 14, 2012

Birds on a Holly Branch

Here is another card using a newly acquired PSX I bought on Ebay this past week. Bluebirds have a special memory for our family. When I see something like this stamp I immediately think blue birds.  They are so fluffed out....it must be cold and lined up together for warmth.  I hope you and yours are cuddled together and warm this evening.  It's beginning to look like Christmas.....


Recipe:

Birds on a Holly Branch
Stamp:  Birds on a Holly Branch PSX K1884
              Rejoice Inkadinkado 96920MM
Ink Pad: Memento Tuxedo Black
               Distress Ink Peeled Paint
               Distress Ink Festive Berries
               Distress Ink Pine Green
Paper:  Graphic 45 Christmas Emporium Collection 8 x 8
Glossy Accents
Copic Markers:
YG01, YG03, YG63, R22, R29 (Holly and Berries)
B41, B21, B24, R000, R01, R20, R22, Y08, Y17 (Birds)
E21, E23 (branch)
BG10 (outline)

Spellbinders Curved Rectangles

Tuesday, December 11, 2012

They Who are Best Friends

Yesterday I pulled out two more retired no longer available (except on Ebay) stamps.  These are 2 more stamps that I have had for a number of years and had not used.  I hope you don't mind that I am using these nla stamps.  If you are serious about wanting a particular stamp and are patient, sooner or later it will become available on Ebay.  Stamps that I purchased just a few years ago for $10 are now selling for $30-$50. I believe that in the future all wood stamps will be scarce and hard to find and valuable....especially the good quality ones like PSX (Personal Stamp Exchange). Just go to www.ebay.com and search for psx rubber stamps and you will see what I mean.  There are still good buys out there but you have to hunt for them.
The stamps I used for this card are PSX but are a licensed product by the artist Suzy Toronto. I hope you like what I did. Thanks for looking.

Card Front
Card inside


Girlfriends

PSX Friends G-3460
PSX Friends F-3459
Art Impressions "All together" Picture Perfect Set 4130 Unmounted
Paper “it takes two” Lucy Rigg LLS105
Ink Memento Tuxedo Black
Copic Markers:
E0000, E02
YR01, YR16, YR12, YR18, YR23
Y13, Y17
YG01, YG06, YG07, YG09
BG11, BG45, BG49
R12, R14
E33
0

Perfect Pearls Mists Heirloom Gold
Enamel Accents Black

Monday, December 10, 2012

My Garden Angel

Yesterday afternoon I joined some friends at a local stamp/scrapbook store in Greenville, SC.  I wanted to share my finished classroom project and also pass on information about this class at The Whimsey. I enjoyed playing with all the different techniques and inks.  Thanks Carol!


My Garden Angel Collage
Angel Home Collage Class
Set your own time for this project!
During this time of year there is so much to do I thought you all may enjoy the chance to do a class when it is the right time for YOU!
The project will take about 90 min. All you need to bring is your paper trimmer and scissors! Everything else will be provided. You will make a plaque for shelf display or to hang on the wall. Choose a color scheme from provided paints (lots to choose from) and plan on getting a little messy! You will be using templates, modeling paste, paints, inks, stamps and more. Limited number of kits, so if you would like call ahead and prepay and reserve your time! $18.00


Heather and Carol
Whimsy
864-987-1077
Sun. 1-5
Mon. Closed
Tues-Fri 9-6
Sat. 10-5

Friday, December 7, 2012

PSX Royal Rabbit Christmas Card

I'm back on track.  So sorry.  Life just got so busy.  I do apologize.  I hope you will forgive my slackness by enjoying this card I created today.  Our Altered Book Club is meeting tomorrow and we are celebrating Christmas with food and gift exchange.  I wanted to make a special card to go with my gift.  The stamp is a vintage PSX created by Pamela Silin-Palmer and lists Santa Rosa, California as the location which really dates it. I first saw it when doing some volunteer cleaning out at The Mercantile Store in Pendleton, SC.  They no longer had the stamp but the sample caught my eye and it was a "must have" if you know what I mean.  We bonded. ;-) It took me 6 months until one became available on Ebay. The rabbit reminded me of when we would celebrate St. Lucia day with cousins in Texas. They asked our daughter to represent St. Lucia, to wear the crown of candles and pass around the rolls. It was a great memory.....and I just love this stamp.
If you have any questions on how I created, colored, etc....please don't hesitate to ask.  I am more than willing to share any small amount of knowledge I have.  Thanks for looking.


Recipe:
PSX Stamp Royal Rabbit K7104
Memento Tuxedo Black Ink Pad
Copic Markers:
0, C1, C3
YR20, YR23, YR27
R01, R22, R29, R39
G94, YG03
E09
Graphic 45 Christmas Emporium Collection 8 x 8 pad

Monday, September 3, 2012

Altered Post Card Seashells

Next Saturday is our local Altered Book Club meeting.  One of my commitments is to do a postcard on the subject of Seashells.  This one took some thinking on my part. After stewing on the project for about 3 weeks I finally decided to do something totally different.  Now you know I love watercolor but when I do a watercolor project it is with stamps and markers.  When searching on the internet on seashells I ran across a children's book about collecting seashells and the artwork for the book blew me away.  So, here is my first watercolor where I DREW the image....not a stamp in sight.  Something weird happened while I was painting.  Do you see the image of a heart between the girls hand and her face?  Well I didn't do that.  It appeared on it's own I assume the way the water worked on the paper??? I decided to leave it. What do you think?

Front


back

Wednesday, August 29, 2012

Disney album

This summer in July we met our son, his wife and the four grandchildren at our time share near Disney World.  They were there for the whole week but we went for just a few days to spend some time with their family.  We had a great time....much too short....but it was a good trip and so much fun for the kids. When putting some of my craft stuff away this past weekend (not a pleasant duty but a necessity) I discovered a blank book that I had in the shape of a castle.....so I rolled up my sleeves and went to work.  Here's the results...an album for my daughter in law to put some of those favorite photos from the vacation at Disney World!  Happy Birthday Holly! I think you are a wonderful mother, wife to our son and the perfect example of the Proverbs 31 lady. Love you lots.


Castle album front


Inside view one 


Inside View two

p.s.  A big THANK YOU to my husband, David, who got these pictures posted inspite of the problems with Google and Blogger.  He is a GENIUS!

Sunday, August 19, 2012

Tim Holtz Creative Chemistry 101

I am a little slow since March when Tim had this fantastic on line class.  Life just gets in the way of what you want to do.....but finally I got a block of time to work on this.  Ten days of classes, 8 of the days consisted of 3 tags 3 techniques and day 10 was only one tag but it was a great one.  A total of 25 tags using a tremendous amount of product.  Distress ink pads, distress stains, distress reinkers, distress markers, distress stickles, distress embossing powder, crackle paint, perfect pearls mist with reinkers, Stampers Anonymous TH stamps, Texture Fades, tags, sticky back canvas, watercolor paper, grungeboard, and Kraft resist...just to name a few. What a Blast! I did one day at a time, gathered my supplies, worked the process and then PUT EVERYTHING AWAY before starting on the next day.  So when I was finishd I took some pictures.  To do them justice I should of taken one picture for each tag but then what a post THAT would of been! So here goes....drum roll please!

1. Blended Distress/Spritz and Flick Technique
2.  Brushless Watercolor Technique
3.  Wrinkle-Free Distress Technique
4.  Alcohol Ink Agates Technique
5.  Archival Resist  Technique
6.  Stamping with Reflections Technique
7.  Water coloring with Re-inkers Technique
8.  Layered Misting Technique (I did not like using the template with the mist,  ran under it)
9.  Custom Stamp Pad Technique
10.  Stamping with Stains Technique
11.  Stained Draft Resist Technique (Too dark for my taste...but that's Mona Lisa for you)
12.  Marbled Stain Technique
13.  Watercolor with Markers Technique
14.  Blending with Markers Technique
15.  Stamping with Markers Technique

16.  Nostalgic Batik Technique
17.  Rusted Enamel Technique (didn't work for me)
18.  Distress Powder Resist Technique

19.  Paint Dabber Resist Technique
20.  Crackle Paint Resist Technique
21.  Shattered Stains Technique
22.Perfect Distress Mist
23. Perfect Distress (My Favorite...magic!)
24.  Perfect Splatter Distress
25.  Rock Candy Distress Stickles Technique

Wednesday, August 15, 2012

Vintage PSX truck with Copic grounding technique

Welcome blog hoppers to the second stop of the Oldies but Goodies blog hop. I went way back to get a really old stamp.  A PSX (Personal Stamp Exchange) that is no longer in business.  I love their stamps/images. The rubber is cut deep and there is a lot of detail in the images. I respect the art and talent that went into making these rubber stamps on wood blocks that were so well finished you could pick out a PSX stamp in the dark just by the touch. Now these stamps can only be found on Ebay and that is sad but fortunate if you are able to acquire one at a decent price.

Lately I have been working my way thru the Copic Coloring Guide Level 2: Nature.  This book is written and illustrated by Colleen Schaan and Marianne Walker and comes with a CD that lets you download the images in the book.  One of the techniques covered is "grounding" and it is the best I have ever seen.  I used that technique on my card. I used the suggested colors in my card (E43 and N3). I flicked out from the image for the road using first E43 and then N3 (no blending done here).  Then used the colorless blender and scrubbed to blend across the flicks until I got the look I wanted.  The next step is to add dots with the brush end of the pen of varying sizes using E43 and then N3. The last step is to add dots using the colorless blender.  Repeat the steps as necessary for the look and color you desire. I used this same technique for the grass using two greens and the colorless blender (minus the dots).

The image was stamped using Memento Rich Cocoa to get an aged and rusty effect.  The group of daises was stamped a second time, fussy cut and popped up.  The windows are colored using B0000 and then covered with Glossy Accents.

Enjoy the hop and kindly leave a word of love and encouragement for all the bloggers!
Mary


August Blog Hop List

1. Cindy Grigiski http://www.stampwithmecindyg.com/

2. Mary Witter http://www.marywitter.blogspot.com/ You are here


4. Barbara K. Wibel http://madeforkeeps.blogspot.com/


6. Angie Williams http://www.angiesstampingspace.blogspot.com

Circus Clown

I'm challenging myself to enter more "Challenges" that are available to us.  Want to join the fun?  I made this card for the Outlawz Friday Challenge.  This is an old stamp from Art Impressions and is no longer available but he sure is a cute clown. (Art Impressions Clown M-1349)
Stamped with Memento Tuxedo Black and colored with Copic markers.  The papers are from Graphic 45. I used the Spellbinders Framabilities Classic Frame to make the entrance to the tent.
Hope you like it!

Wednesday, August 1, 2012

Autumn Harvest

Today I want to welcome those that have come to my blog via the Oozak blog.  I am so proud to be on Rusty's team.  Rusty and Oozak give the best customer service and the best prices and if you haven't visited Oozak.com you are missing A LOT! So much inspiration from Rusty's customers.  And while you are there check out Sandy's video. You will love it.
This card I made using a new stamp set that was just released at CHA (Craft and Hobby Association) in Chicago in July from Art Impressions.  They have several sets in this series and I love them ALL! They are the Art Impressions new series called "TryFolds".  Three stamps that work together.  I present the Barn set using a side step card.
The fall words is a stamp from The Purple Onion Designs.


I like the instructions for the side step card at this link: http://www.splitcoaststampers.com/resources/tutorials/sidestepcard

Stamps: 

Purple Onion Designs    “Fall Words”
Art Impressions  “TryFold Barn” (new release)
Ink:
Momento Tuxedo Black
Kaleidacolor Autumn Leaves
Copic Markers:
BG0000, B21 (sky)
BV11, BV17 (grapes)
Y19, YR02, YR04, YR09, YR16, YR24, R35, R39 (trees, pumpkins,grass)
G24, YG03, YG61, YG63, YG93 (grass)
E13, E15, E18, E71, E74, E84, E87 (trees, wagon, barrel)
W0, W3, W5 (barn, road)

Saturday, July 21, 2012

Giraffe ZooCrew

Just a quick post this morning to show you a card from Art Impressions just released at CHA. I was privileged to take two classes from Art Impressions that Bonnie Krebs taught where we made 6 cards using new stamps.  We were also able to purchase all the new releases so  eventually I will post them all.  Here is the first one. The giraffe was trimmed along the right side and I edged it with a dark grey copic marker.
Giraffe set 4190
Card front
Copic markers used:  E21, E31, E08 and BV0000

Wednesday, July 18, 2012

Fred B. Mullett

Welcome to my blog...Oldie But Goodie bloghoppers!  Have you ever purchased a stamp because you absolutely love it...love it so much that it is put aside and never gets inked? Well that is the thought behind the OBG bloghop.....and I dug out a oldie/goodie for the occasion.
Let me introduce you to Fred B. Mullett (yes that is his real name and a real person).  I first became aware of this artist in 2001 when attending a convention called The Creative Palette in St.Mary's, Ga. Mr. Mullett started stamping by taking actual natural items found on walks and around the yard, inking them up and stamping an image.  I must explain that Mr.Mullett does not refer to this art as rubber stamping, but I quote from his website,  " tactilely interactive vulcanized tools for the replication of graphic imagery".  I loved these stamps the first time I saw them but have only managed to collect two of them, both of which I use here...two fish. 
(Your next stop is Cindy Grigiski Complete hop is listed below) Happy Hopping!


Stamps:
Fred B. Mullett 003 Pompano
Fred B. Mullett 061 Garibaldi
Great Impressions  D391 On the Sand
Great Impressions H181 Seaweed
Great Impressions H200 Water Swirl Border


Ink:
Archival Jet Black
Archival Coffee


Markers:
Marvy Brilliant Yellow 43
Marvy Olive Green 15
Marvy Sepia 45
Marvy Terra cotta 88
Marvy Pine Green 72


Misc.
Stamp positioner
Mist bottle
paint brush #5
water bottle
water color paper 120#


Blog Hop Schedule:
1. Maria Matter http://joyfulstamper.blogspot.com/
2. Lorie Souther http://www.thethinkinspot.blogspot.com/
3. Vicki Patranc http://bountifulblessings2u.blogspot.com/
4. Barb Wibel http://madeforkeeps.blogspot.com/
5. Mary Harmon http://sparkly-train.blogspot.com/
6. Gina Lindsay http://ginasmakingsandmusings.blogspot.com/
7. Mary Witter http://www.marywitter.blogspot.com/ You are here
8. Cindy Grigiski http://www.stampwithmecindyg.com/

Opening day at CHA

It is way after midnight, central time and I have to get to bed but wanted to post some pictures I promised. Just a tease because it would take me til morning to post all the ones I took today.  First things first was to head to the Ranger booth and see Tim in action:
Then it was off to the rest of the booths.   First up was Lala Land and I learned they now have diecuts. These diecuts cut and emboss at the same time:

I have a lot more Lala land pictures but no time tonight. These next pictures are from Globalcraft Memories. I hope the pictures do them justice. These were awesome.

There was so much to take pictures of at the Graphic 45 booth...here is just a sample:
Last ones for tonight are from the Art Impressions booth....enjoy!  I took 2 classes with Bonnie Krebs this evening at the Creative Cuts and Crafts store in Elmhurst, Illinois. I will post samples I made (6) later this week.  We will be traveling home the next 2 days starting at noonish tomorrow.


Tuesday, July 17, 2012

Chicago....we are here! CHA summer 2012

Cindy and I arrived at our hotel in Chicago yesterday and never stopped until dinner time.  We encountered lots of construction but the gps on the Prius got us to the right destination.  So far we have not encountered the problems I had last year.  We visited a scrapbook store in Elmhurst, Illinois yesterday.
www.creativecutsandcrafts.com


Next on our agenda was lunch....Portillo's, a must stop when visiting Chicago:


Check back tomorrow with pictures from the floor of the convention...including the celebrities!  Time to go!!

Tuesday, July 10, 2012

Disney World Tags

Not a lot of chatter from me this morning but I wanted to show you what I was working on this past weekend.  My son, his wife and 4 children are going to Disney World later this month and we hope to join them for a few days.  She asked me to make gift tags for her as she has bought up some gifts to give each of the children each day while they are vacationing.  I hit a sale at Michaels on Disney stickers and die cuts, bought up a few and came home and started making tags...my goal was 28 tags. Seven days times 4 children.  So here I present my results, I hope you like them....."it's a small world after all"!   
M-I-C.....K-E-Y....MOUSE!


"That's all Folks!"

Thursday, July 5, 2012

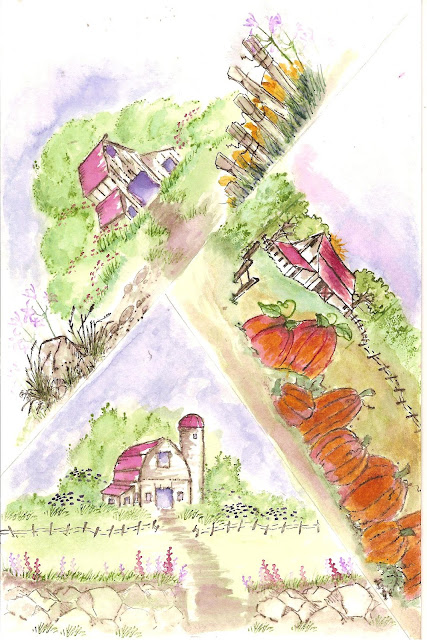
Watercolor Barn Altered Book page 2

Completed tonight the second page of my watercolor barns for the Altered Book I am working in for Altered Book Club.  Again I used Art Impressions watercolor stamps and used Marvy Markers and brush as the medium.    I really enjoy doing watercolor with Art Impressions stamps, the process is very relaxing and the variety of stamps makes it so easy to create my own work.


Wednesday, July 4, 2012

Watercolor Barns Altered book page one

Today I have been working on my altered book club swap. The subject is "Barns" so I decided to do several watercolor barn scenes.  This is the first page done on 120# watercolor paper that will be tipped in when I am finished. I used stamps from Art Impressions and colored with Marvy Markers and paint brush.
The technique used is shown at the tab at the top of the page.

Watercolor Barn collection

Tuesday, July 3, 2012

Gypsy postcard

This morning I wanted to share a altered postcard that I finished last night for our July Altered Book Club meeting.  To make this card I started with a piece of chipboard and 2 pieces of cardstock 4" x 6". One side of each piece of cardstock was aged using Distress Ink Old Paper and Tea Dye and a large selection of my altered art stamps.  After aging and stamping the cardstock I glued them to the chipboard base. I added color to the image using my Copic markers.  I love using my altered art supplies and I hope you like it too.  If you have any questions about my postcard leave me a comment. Have a great 4th of July everyone, be safe.
Gypsy postcard front
Gypsy postcard back

Supplies:
Stamps
Stampers Anonymous "Spills and Splatters" CMS028
Stampers Anonymous "World Traveler" CMS027
Stampers Anonymous "Splatter" K5-1430
Penny Black "Classic Border" 2005J
Stamp Francisco "Girl holding a rose" 1982-97
Raindrops on Roses 2003 "gauze"
Unknown "Large 6-sided" altered art cube
Ink
Archival Ink "Jet Black"
Ranger Tim Holtz Distress Ink "Old Paper"
Ranger Tim Holtz Distress Ink "Tea Dye"
Copic Markers
E0000, E02, E31, E35
R02, R20
G24
Miscellaneous
Fortune tellers palm (from the internet)

Sunday, July 1, 2012

Tilda with a Daisy

Sorry bloggers...life got very very busy.  I promised to make a biblical costume for vacation bible school, my husband went to Athens, Greece for 10 days,  I was responsible for all the arts and crafts for VBS, my husband had to go have a possible skin cancer checked out (surgery scheduled for July), my daughter and her husband came to visit from Wichita Falls, Tx., along with other daily activities.
So, here is my first post in over a month. Over at www.blog.oozak.com we have just posted the new challenge for the month. You are going to want to participate in this one if you haven't before. The prize is worth $120 retail so go check it out!

This is my contribution to the Bright Color's challenge:


             Great Impressions “just for you” C370

Any questions on how I did this card, please don't hesitate to ask. I love to share.  Have a great day and stay cool!

Saturday, May 26, 2012

Operation Write Home Blog Hop


Welcome to Memorial Day Sketch BlogHoppers!  This is the first time I have participated in this and I am excited and happy to be part of this event.
About two years ago my oldest grandson, Nick, a Marine MP, returned from duty in Afghanistan. 
After months of anxiety this grandma could hardly wait to get my arms around him and hug his neck! So proud of you Nick!                     
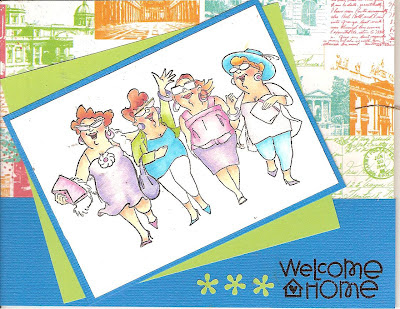
This stamp by Art Impressions reminds me of that time when we all welcomed our sons and daughters, husbands and wives, home. The original image was stamped, colored with Copic markers and then reduced by 30% in order to fit the sketch.  I used sketch #43.
Thank you for bloghopping with OWH.


Recipe:
OWH Welcome Home
Stamp: Art Impressions Uptown Girls Set 4129 (Girlfriends)
             Paper Smooches Circle of Honor M25099
Punch:  Punch Bunch (small flowers)
Memento Ink Tuxedo Black
Paper:  TPC Studio Spring Break Printed Pad P62130
             Bazzil Cardstock Pauly Poo (blue) Grasshopper (green)
Copic Markers:
E000, E02, R02, R14  (skin)
B60, B63, B66
RV000, RV00, RV02, RV06, RV09
BV000, BV00, BV02
BG000, BG02, BG05
YG25, YG11
YR14, YR18, (hair)
Y32, Y38 (hair)
E21, E13, E19 (hair)
CO


Wednesday, May 16, 2012

Nesting birds


Welcome Oldies but Goodies blog hoppers!  This one certainly qualifies as an Oldie and I think it is a real Goodie!  I must of had this stamp for at least 10 years and I have never used it.  
The stamp is from Magenta, 08-047P.  There is no name on the stamp (I call it Nesting Birds) and searches on the internet including Ebay did not return any hits for this stamp.  This is one of those stamps that you love to hold and touch. 
I stamped it on Neenah solar white card stock and colored it using my Copics, matted on pieces of scrapbook paper from my piece pile. Added ribbon, hat pin and pearls as embellishments. It doesn't show up in the picture but card base was white card stock so I aged it using Tim Holtz Distress old paper ink with the blending tool.
The shape of this stamp reminds me of the vintage cabinet cards. I would love your comments or questions concerning this post. Thanks for visiting my blog.

From this to


This

Here is the blog hop schedule:

1. Maria Matter http://joyfulstamper.blogspot.com/

2. Lorie Souther http://www.thethinkinspot.blogspot.com/


3. Vicki Patranc http://bountifulblessings2u.blogspot.com/


4. Barb Wibel http://madeforkeeps.blogspot.com/


5. Mary Harmon http://sparkly-train.blogspot.com/


6. Gina Lindsay http://ginasmakingsandmusings.blogspot.com/


7. Mary Witter http://www.marywitter.blogspot.com/   (You are here)


8. Cindy Grigiski http://www.stampwithmecindyg.com/